TL;DR
All the code can be found https://github.com/HTB-HoverTableBot/hoverboard-driver.
Idea
The project is born from the need to test the algorithms for my doctorate thesis. Currently, the laboratory is closed and access to staff is not allowed.
One might think that at the time of virtuality, you could work remote, but not all have the possibility of remotely remotely remotely.
In search of alternatives
Simulators are awesome! Don’t get me wrong, but not all the things can be discovered from them. So… we need a robot, where to start? In my university, we have a project of educational robotics called edu-romaa. The robot has differential traction and is designed completely with free software.
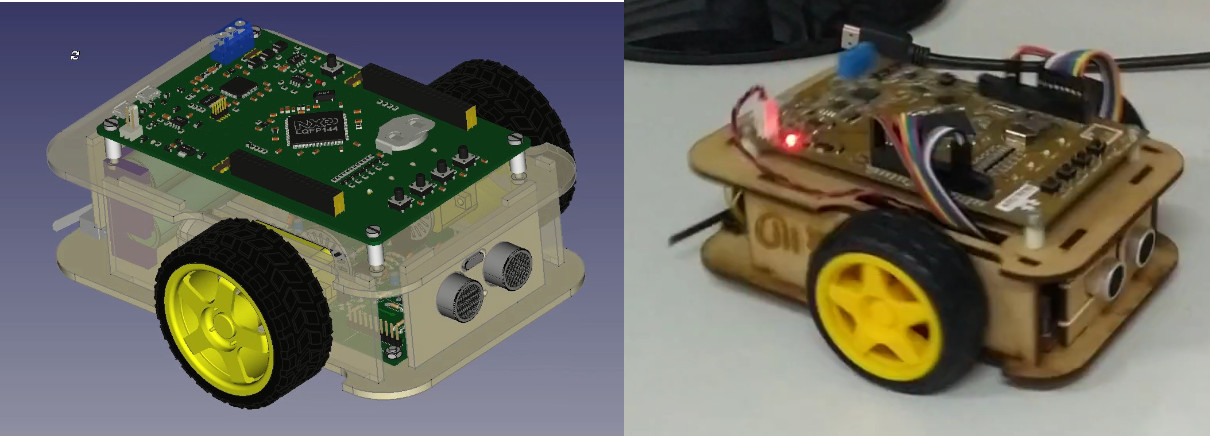
EduRoMAA (robot) uses two motors with a reduction. The robot works excellent to test simple robotics algorithms and begin to explore the programming of embedded systems. But Robot problem is that we could not use heavy sensors, because the motors are not designed to transport heavy loads. Looking for Motors for Robots I found this Wonderful article of Hackaday. In this article, the characteristics of the engines and a link to Discourse in which they mention two repositories:
I decided on the second because I found a Driver for Ros that was theoretically functioning.
bipropellant magic
BIPROPELLANT-HOVERBARD-FIRMWARE allows us to control Hoverboar engines, using a UART interface. This combined with the protocol module allows us to control the speed of the motors, measure the speed from the Hall effect sensors.
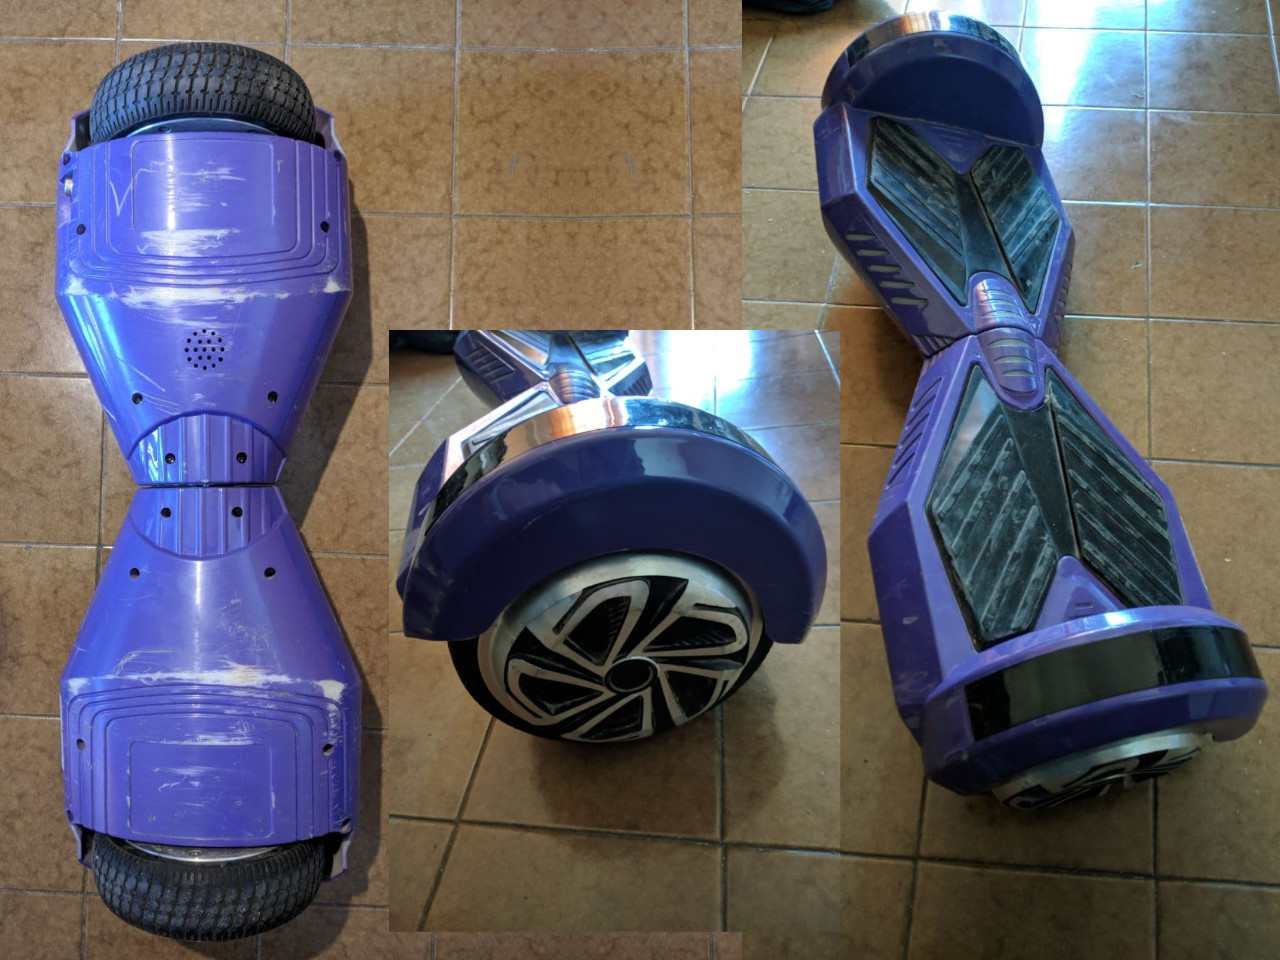
The Hoverboard
As you can see by the images, Hoverboard is secondhand. You can see some scratches that demonstrate it.
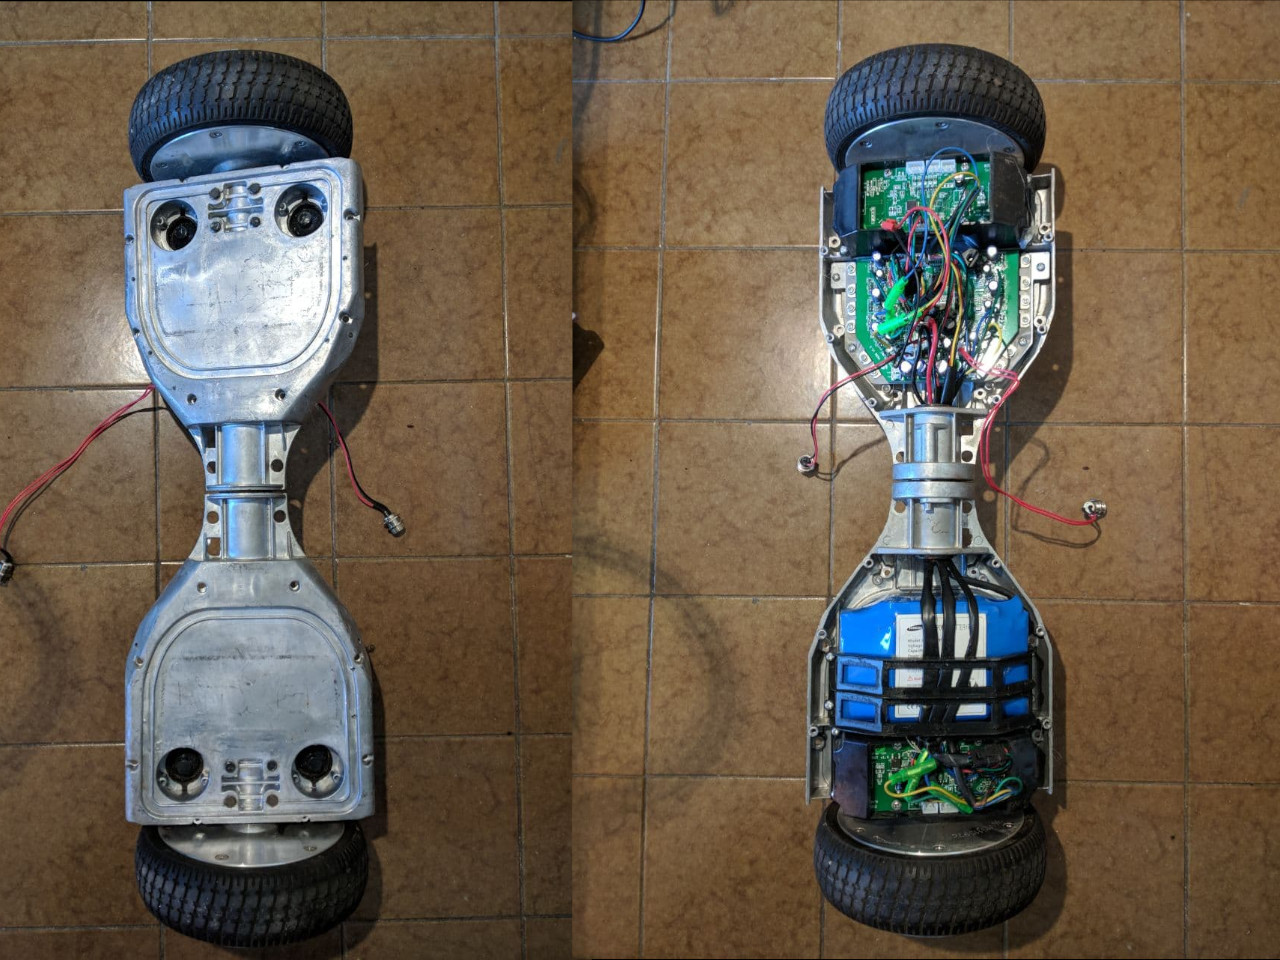
Disassembly.
The disarmed process is pretty Straight Forward. Remove the screws, disconnect some chips, and separate the electronics from the mechanics. There are plenty of tutorials 1 and more detailed videos out there, so I’m not going to stop at this.
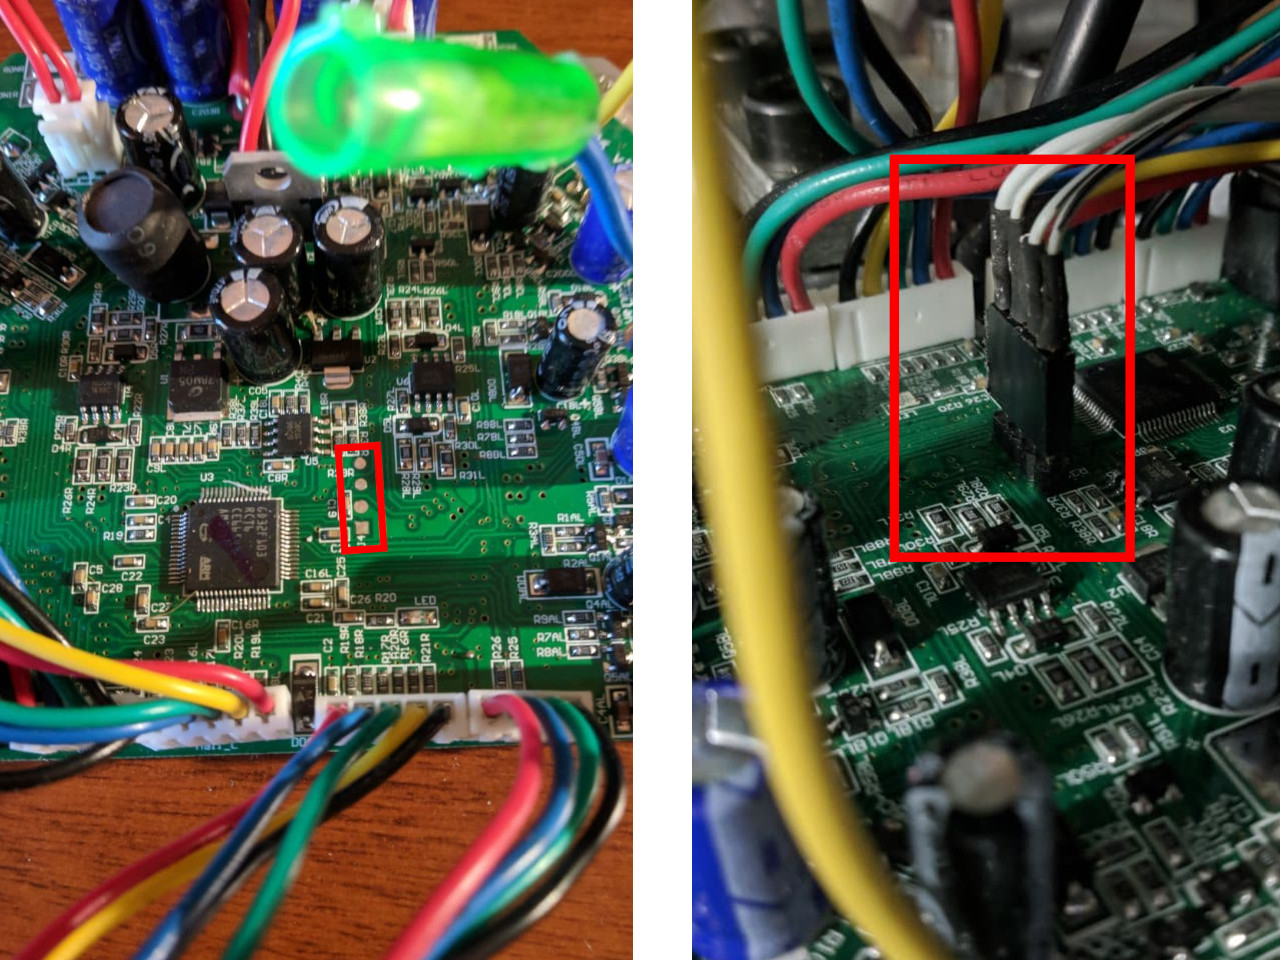
Programming
The part that takes a little more time is programming. Fortunately, the printed circuit has some pads to weld a strip of pins and access the programming port.
How it’s work?
Basically, all the magic is done by Alex Makarov hoverboard driver. After flashing hoverboard-driver firmware into the hoverboard, we can attach an USB-UART adapter and start to send velocity commands!
All the code is develop in this fork due to custom configuration for my robot. In these lines I basically added the differential drive robot equations:
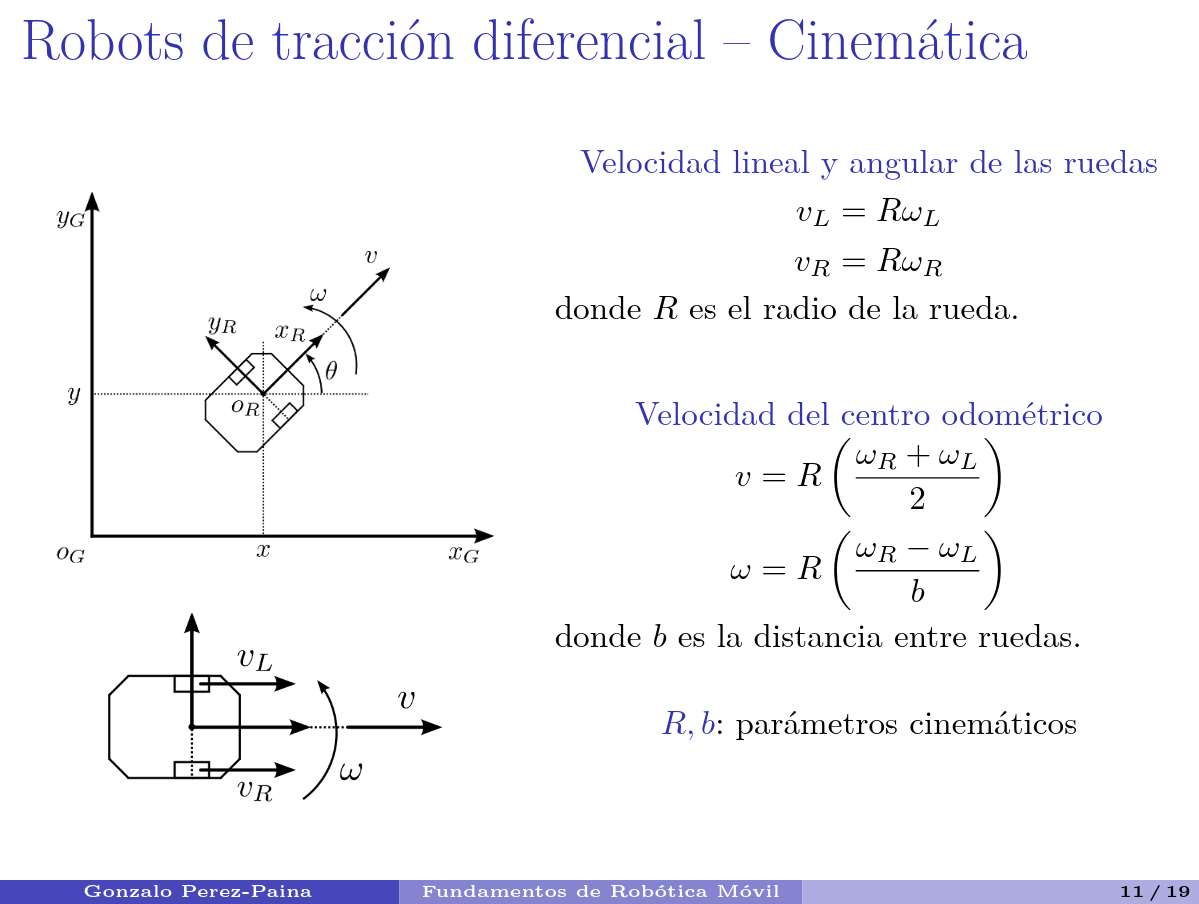
First, we get wheels velocity from the hoverboard:
    double v_right = joints[0].vel.data; // right_wheel speed in m/s
    double v_left = joints[1].vel.data; // left_wheel speed in m/s

    robot_vx = ((v_right + v_left) / 2);
    robot_vy = 0;
    robot_vth = ((v_right - v_left)/_length_between_wheels);
Once we have the speed of each wheel, we compute a delta position increment based on the previous timestamp:
    //compute odometry in a typical way given the velocities of the robot
    //current_time and last_time are ros::Time variables
    double dt = (current_time - last_time).toSec();
    double delta_x = (robot_vx * cos(robot_th) - robot_vy * sin(robot_th)) * dt;
    double delta_y = (robot_vx * sin(robot_th) + robot_vy * cos(robot_th)) * dt;
    double delta_th = robot_vth * dt;
We integrate each delta position (and its errors):
    robot_x += delta_x;
    robot_y += delta_y;
    robot_th += delta_th;
And finally, we make an Odom ROS msg and publish it:
    nav_msgs::Odometry odom;
    odom.header.stamp = current_time;
    odom.header.frame_id = "odom";

    //set the position
    odom.pose.pose.position.x = robot_x;
    odom.pose.pose.position.y = robot_y;
    odom.pose.pose.position.z = 0.0;

    // odom.pose.pose.orientation = odom_quat;

    //set the velocity
    odom.child_frame_id = "base_link";
    odom.twist.twist.linear.x = robot_vx;
    odom.twist.twist.linear.y = robot_vy;
    odom.twist.twist.angular.z = robot_vth;

    //publish the message
    odom_test.publish(odom);
We could have calculated Yaw’s angle from the rotations of the wheel and converting it to Quaternions, but I still did not implement it.